Maintenance and calibration of Brightness Meter
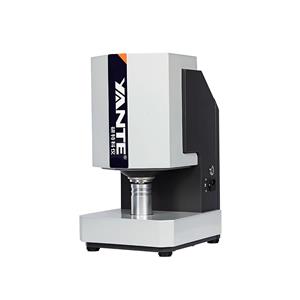
The Brightness Meter mainly measures the whiteness of various objects such as paper and cardboard, pulp and chemical fiber pulp, cotton and chemical fiber, textiles, plastics, starch, salt, white cement, porcelain clay, talcum powder, etc. It can also measure the optical properties such as opacity of thin sheet materials.
After the instrument has been operating for a long period of time or has been replaced with a new light bulb or standard, the fluorescence factor u value should be recalculated and modified as follows:
1) Push the large and small pull plates to the bottom, and perform zero and accurate adjustment.
2) Place a fluorescence standard plate (plate 3 or fluorescence transfer standard) on the sample holder, with a whiteness value of R457 and a fluorescence whiteness value of F. Press the "measurement key", observe the displayed value, and adjust the fluorescence method as described in 5.3.1 to make the displayed value equal to R457.
3) Pull out the large pull plate to the bottom (at this time, the small pull plate is still pushed to the bottom), press the "measurement button", and the displayed number is recorded as r457.
Calculate u=F/(R457-r457-FA); Among them, FA is the fluorescence correction value (generally not modified).
Using the method of inserting fluorescence factor as described in 6.2.3, insert the calculated value u.
4) Verify the fluorescence standard plate or fluorescence transfer standard value: Push the large and small pull plates to the bottom, press the "measurement button", and the display number should be equal to R457. Pull out the large pull plate to the bottom, press the "fluorescence whiteness" button, and the display number should be equal to the F value.
Standardizer and Quantity Transfer
Standardizers can be divided into two types based on their purpose: transmission standard and working standard, and can be further divided into two types based on their characteristics: non fluorescent and fluorescent standard.
Transfer standard: Transfer standard is used to transfer quantity values. The standard should have a uniform and flat diffuse reflective surface, and commonly used transfer standard materials include paper samples, white ceramic or plastic plates ground with fine sand, barium sulfate or magnesium oxide powder, etc. Users can choose appropriate transfer standards (try to use materials that are the same or similar to the tested ones), and the metrology department will calibrate the quantitative values according to a certain period. For non fluorescent standards, R457 and Ry values should be calibrated, while for fluorescent standards, R457 and fluorescence (whitening) whiteness value F should be calibrated.
Working standards: This instrument provides three whiteboards as working standards. Among them, plates 1 and 2 are non fluorescent plates, and plate 3 is a fluorescent standard plate. Board 1 is used as a work board to calibrate the instrument during daily work, while Board 2 is used as a calibration board. Please store it carefully and use it to calibrate the measurement values of Board 1 if necessary. The calibration method is to use Board 2 to calibrate the instrument, and then measure the R457 and Ry values of Board 1 (refer to 6.2 and 6.3). Board 3 is used to adjust the ultraviolet radiation component of lighting and set the fluorescence factor (refer to 6.3 and 8.1).
Transmission of measurement values: If the working standard board is used for a long time and may change, the measurement values should be regularly transmitted using the transmission standard and re calibrated; After preheating and zeroing, first use the non fluorescent transfer standard to calibrate, and then use the transfer standard containing fluorescence (refer to 6.3.4 and 8.1) to adjust the instrument and set the fluorescence factor u. Continue to measure work standards


